
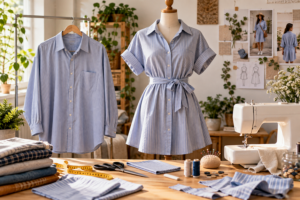





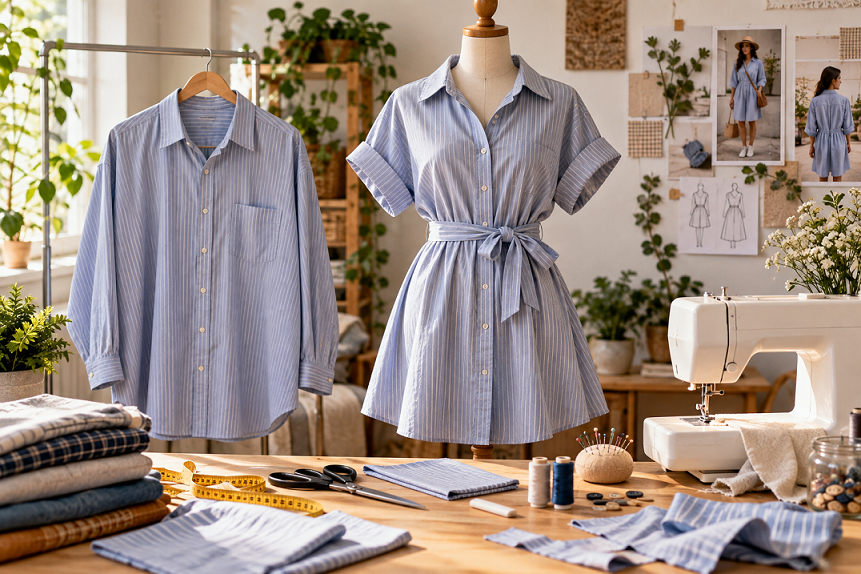
Thrift flipping is one of the most creative ways to give pre-loved clothing a completely new purpose. Instead of leaving an over sized men’s button-down in the back of a closet—or passing it over at a thrift store—you can transform it into a stylish shirt dress with relatively simple sewing techniques.
An over sized men’s shirt is particularly useful for this kind of project because it already has several finished details: a collar, button placket, cuffs, sleeves, and often a generous amount of fabric. With thoughtful cutting and tailoring, those existing features can become part of a feminine dress design.
Beyond creativity, this approach fits into the broader idea of keeping garments in use for longer. The Ellen MacArthur Foundation identifies remaking, repair, resale, and reuse as important parts of a more circular fashion system.
What Is Thrift Flipping?
Thrift flipping means buying, finding, or using an existing garment and creatively modifying it into something different. Unlike simply altering a garment to fit, a thrift flip can substantially change its appearance, function, or silhouette.
For example, an over sized cotton men’s shirt can become:
- A belted shirt dress
- A short summer dress
- A button-front mini dress
- A tiered dress
- A tunic dress
- A sleeveless sundress
- A wrap-style dress
The goal isn’t necessarily to make the garment look completely new. In many cases, the charm comes from preserving recognizable original details while giving the item a new shape.
The Ellen MacArthur Foundation describes remaking as creating a new product from existing products or components, including re-purposing and other modifications.
Why Over sized Men’s Shirts Work So Well
Over sized shirts offer several advantages for beginner sewing projects.
1. They provide plenty of fabric
A men’s XXL or XXXL shirt can contain substantially more usable fabric than a fitted women’s shirt. That extra material gives you room to experiment with shaping, gathering, sleeves, and skirt volume.
2. The button placket is already finished
One of the most time-consuming parts of making a button-front garment is constructing a neat placket. With a thrifted shirt, the buttons and buttonholes are already there.
3. The collar gives the dress structure
You don’t need to draft and sew a collar from scratch. Keeping the original collar can make your finished dress look professionally constructed.
4. Interesting details are already included
Chest pockets, contrasting buttons, cuffs, embroidery, stripes, and unusual prints can become design features rather than things you need to recreate.
Choosing the Right Shirt
The success of a thrift flip begins before you pick up your scissors.
Look for a shirt that is:
- Over sized enough to provide usable fabric
- In good structural condition
- Free from major stains or permanent odors
- Made from a comfortable fabric
- Long enough for your desired dress
- Relatively symmetrical
- Equipped with buttons that are securely attached
Which Fabrics Are Best?
For a first project, cotton or cotton-blend shirts are usually easier to handle than slippery fabrics.
Good options include:
Cotton poplin: Crisp and structured.
Oxford cloth: Slightly heavier and durable.
Linen or linen blends: Lightweight and breathable, although they wrinkle easily.
Rayon: Drapes beautifully but can be more challenging to cut and sew accurately.
If you’re new to sewing, start with a medium-weight woven fabric rather than a very stretchy or slippery material.
Tools and Materials You’ll Need
You don’t need an extensive sewing studio.
Basic supplies include:
- Over sized men’s button-down shirt
- Sewing machine
- Fabric scissors
- Measuring tape
- Pins or sewing clips
- Seam ripper
- Matching thread
- Fabric chalk or washable marker
- Iron
- Safety pins
- Optional elastic
- Optional matching or contrasting fabric
An iron is particularly important. Pressing seams before and during construction can make a significant difference to the finished appearance.
How to Turn an Over sized Shirt Into a Dress
Here’s a practical beginner-friendly approach for creating a simple belted shirt dress.
Step 1: Wash and Inspect the Shirt
Wash the shirt according to its care instructions before cutting it.
This matters because some fabrics shrink after washing. You don’t want to complete your dress and discover that the fabric becomes noticeably smaller during its first wash.
Check the garment carefully for:
- Holes
- Weak seams
- Stains
- Missing buttons
- Fraying
- Fabric thinning
Repair anything that needs attention before beginning.
Step 2: Decide on the Dress Length
Put the shirt on over clothing and determine approximately where you want the hem to sit.
A longer shirt can become a midi-style dress, while a shorter over sized shirt may work better as a mini dress or tunic.
Don’t cut directly at your desired final length. Leave extra fabric for the hem.
Step 3: Create the Waist Shape
An over sized men’s shirt will usually be much wider than your body.
You can create shape in several ways:
Option A: Add darts
Darts provide a fitted waist and a more traditional dress silhouette.
Option B: Add a waist seam
You can divide the shirt into a bodice and skirt section and then attach them together with gathering or controlled fullness.
Option C: Add a belt
This is the easiest beginner option. Keep the dress relatively loose and use a fabric belt to define the waist.
For a first project, a belt is particularly forgiving because you don’t need to achieve perfect waist shaping through the side seams.
Step 4: Shape the Side Seams
Turn the shirt inside out and gently pin the sides closer to your body.
Don’t make the fit excessively tight. You need enough room to sit, walk, raise your arms, and move comfortably.
Baste the side seams first and try the garment on before permanently stitching them.
This is one of the most useful habits in garment sewing: fit before final stitching.
Step 5: Create the Skirt
You can keep the original shirt shape for a straight dress or introduce more volume.
For a fuller silhouette, consider adding:
- Gentle gathers
- Pleats
- A separate fabric panel
- A gathered skirt section
If the original shirt isn’t wide enough for your desired skirt, you can use fabric from the sleeves or another coordinating thrifted garment.
Step 6: Rework the Sleeves
You have several choices.
Keep the sleeves: Roll them for a relaxed look.
Shorten them: Create short sleeves suitable for warmer weather.
Create cuffed sleeves: Preserve the original cuffs and turn them into a deliberate design feature.
Remove them: A sleeveless dress can look completely different from the original shirt.
If you remove the sleeves, finish the armholes neatly with bias binding or a facing rather than leaving raw edges.
Step 7: Finish the Hem
Try on the dress and mark the final hemline.
Turn the fabric inward, press it, and stitch the hem evenly.
A clean hem is one of those small details that can make a handmade garment look considerably more polished.
Step 8: Add Your Personal Touch
This is where the thrift flip becomes uniquely yours.
Consider adding:
- A contrasting belt
- Decorative buttons
- Embroidery
- Lace trim
- Patch pockets
- Fabric bows
- Appliqué
- Contrast stitching
- A fabric belt made from the original sleeves
Avoid adding too many decorative elements at once. If the shirt has a strong stripe or print, simple tailoring may be enough.

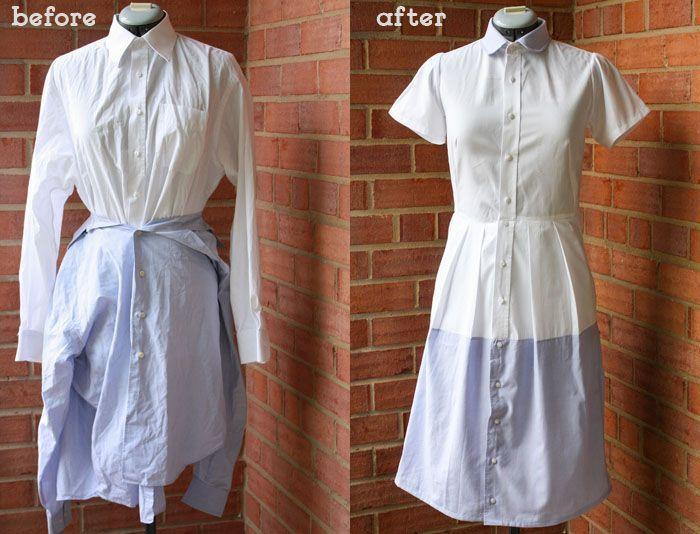
Three Easy Shirt-Dress Designs to Try
The Classic Belted Dress
Keep the collar, button front, and sleeves. Shape the sides gently and add a matching fabric belt.
This is probably the simplest transformation and works particularly well with striped or solid-color shirts.
The Puff-Sleeve Dress
Preserve the upper sleeve and gather the lower sleeve section for a softer silhouette.
This can turn a masculine over sized shirt into something noticeably more feminine without changing the entire garment.
The Tiered Shirt Dress
Use the original shirt as the bodice and attach a gathered fabric tier below it.
This is useful when the original shirt isn’t long enough to become a full-length dress.
Practical Thrift-Flipping Tips
Preserve valuable original details
Don’t automatically remove everything that makes the shirt distinctive.
A pocket, embroidered logo, unusual cuff, or vintage button can become a focal point.
Use the existing seams whenever possible
Working with existing construction saves time and can produce cleaner results.
Make temporary alterations first
Pinning and basting allow you to experiment without permanently committing to a particular design.
Don’t underestimate pressing
Pressing fabric isn’t the same as ironing finished clothing. Press seams as you construct them so the garment maintains a clean shape.
Check transparency
Lightweight white shirts can become considerably more transparent when transformed into dresses. Hold the fabric against light before cutting and consider whether you need a lining or slip.
Can Thrift Flipping Be a Sustainable Fashion Practice?
It can contribute to keeping existing clothing in use, particularly when an unwanted garment is successfully repaired, altered, or remade instead of being discarded.
However, it’s important not to treat every DIY alteration as automatically sustainable. New materials, tools, transportation, energy, and eventual disposal also have impacts.
The broader circular-fashion approach focuses on keeping products and materials in use at their highest value for longer.
For a deeper look at the concept of designing fashion around longer use and circularity, see the Foundation’s vision for a circular economy for fashion.
Turning Thrift Flipping Into a Creative Skill
Thrift flipping is more than simply cutting an old shirt shorter. It teaches practical garment-making skills such as measuring, pattern adaptation, seam construction, fitting, fabric handling, and design.
Start with inexpensive shirts so mistakes become part of the learning process. Your first dress may not have perfect seams or a professional fit—and that’s okay. Each project gives you information about how different fabrics behave and how much ease you personally prefer.
As your confidence improves, you can experiment with more complicated transformations, including combining multiple garments into one design.
Conclusion
Turning an over sized men’s shirt into a cute dress is a practical introduction to thrift flipping and garment up cycling. The existing collar, buttons, sleeves, cuffs, and fabric give you a useful starting point, while simple techniques such as reshaping seams, adding a belt, modifying sleeves, and creating a new hem can completely change the garment’s appearance.
The best approach is to start with a suitable shirt, plan before cutting, make temporary alterations, and focus on clean finishing. Most importantly, treat the original garment as a source of design possibilities rather than simply raw material.
With practice, a basic thrift-store button-down can become a personalized dress that reflects your own style—and the process can help you develop practical sewing and design skills while extending the useful life of an existing garment.


