

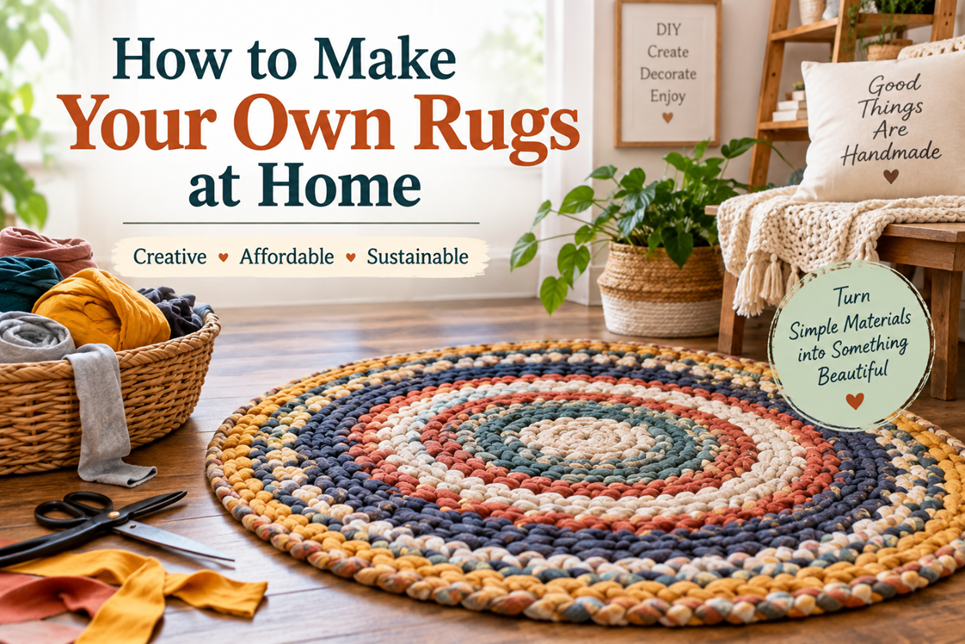
A handmade rug can completely change the feel of a room while giving you the opportunity to create something that matches your exact colors, size, and style. The good news is that you don’t need an expensive studio or professional weaving equipment to get started. With basic materials such as old T-shirts, fabric scraps, yarn, rope, or a simple loom, you can make attractive rugs at home.
The best method depends on the type of rug you want, the materials you have available, and how much time you want to spend. Braiding and crocheting are approachable options for beginners, while weaving and tufting provide greater control over patterns and texture. Traditional rug construction also includes flat weaving, hand-knotting, and hand-tufting, each producing a different appearance and feel.
Choose the Right Rug-Making Method
Before buying materials, decide what kind of rug you want to make.
1. Braided Fabric Rug
Braided rugs are excellent for beginners because they can be made from old sheets, cotton clothing, T-shirts, or fabric scraps.
Long strips are braided together and then arranged into a round, oval, or rectangular shape. The braid is secured as you work so the finished rug maintains its form.
For a detailed step-by-step example, see HGTV’s braided rug guide.
Best for: Bedrooms, reading corners, children’s spaces, and casual living areas.
2. Crochet Rug
If you already know basic crochet stitches, a crochet rug can be relatively straightforward. Thick cotton cord, T-shirt yarn, or specially designed rug yarn can be used.
A simple circular rug can begin with a small center ring and expand outward through successive rounds. You can change colors to create stripes, geometric patterns, or a simple gradient.
Best for: Small mats, bedside rugs, bathroom rugs, and decorative accent pieces.
3. Woven Rug
A woven rug uses vertical warp threads and horizontal weft material. You can use a purchased frame loom or make a basic loom yourself.
For beginners, plain weave is a practical starting point because the over-under pattern is easy to understand. Fabric strips, wool, cotton, and chunky yarn can all create different textures.
A key consideration is tension. The warp needs to remain firm and evenly spaced so the finished rug doesn’t become distorted.
4. Tufted Rug
Tufting has become popular for creating colorful, graphic rugs. Yarn is pushed through stretched backing fabric using a manual or powered tufting tool.
This technique makes it easier to create curved shapes, lettering, abstract artwork, and bold patterns. However, tufting requires additional equipment and careful finishing.
5. Rope or Coiled Rug
A rope rug is another simple option. Thick cotton rope, jute, or polyester rope can be arranged into a spiral and secured to a suitable backing.
For an example of this approach, HGTV’s rope-rug tutorial shows how a coiled rope construction can be turned into a practical entryway mat.
Materials You’ll Need
Your supplies will vary according to the technique, but a basic DIY rug project may require:
- Fabric scraps or old T-shirts
- Cotton, wool, or rug yarn
- Rope or cord
- Scissors
- Measuring tape
- Needle and strong thread
- Crochet hook, if crocheting
- Rug canvas or mesh, if hooking or tufting
- Loom or wooden frame, if weaving
- Fabric clips or safety pins
- Non-slip rug backing
- Fabric adhesive, where appropriate
- A clean, flat workspace
For fabric rugs, wash and completely dry recycled clothing before cutting it. This helps remove dirt and gives you a better idea of how the material behaves.
How to Make a Simple Braided Rug
A braided rug is one of the most accessible projects for a first-time rug maker.
Step 1: Select Your Fabric
Cotton sheets and lightweight cotton clothing are particularly useful because they can be cut or torn into long strips.
Avoid combining fabrics with dramatically different thicknesses unless you intentionally want a mixed texture.
Step 2: Cut the Strips
Cut fabric into reasonably consistent strips. Uniform width makes the braid easier to control.
If using old T-shirts, remove bulky seams and other sections that could create uneven areas.
Step 3: Start Braiding
Join three strips and begin a basic three-strand braid.
Keep the tension consistent. Pulling extremely tightly can cause the finished rug to curl or pucker.
Step 4: Build the Rug
As the braid becomes longer, begin coiling it around itself.
For a round rug, gradually wrap the braid around the center. For an oval rug, allow the central section to become longer before building outward.
Step 5: Secure the Braid
Sew the adjoining sections together with strong thread as you go. This is more reliable for a floor rug than depending entirely on adhesive.
HGTV’s detailed instructions also emphasize controlling tension because pulling fabric too tightly can cause puckering around curves.
How to Make a Rug From Old T-Shirts
Old T-shirts are particularly useful because they can be transformed into soft fabric strips instead of being thrown away.
Simple T-Shirt Rug Method
- Collect clean, unwanted T-shirts.
- Cut away thick seams and unsuitable sections.
- Cut the remaining fabric into strips.
- Stretch the strips gently so they curl into a yarn-like form.
- Join strips together as necessary.
- Crochet, braid, weave, or knot the material into your chosen design.
- Secure the edges carefully.
- Add a suitable non-slip backing.
Another simple approach is to attach knotted T-shirt pieces to a suitable mat backing.
The advantage of this technique is that you can coordinate colors from clothing you already own, creating a rug with personal significance.
How to Make a Woven Rug at Home
If you want a more structured, textile-like result, try basic weaving.
Prepare the Loom
A small frame loom is enough for a beginner-sized project. Stretch strong warp material vertically across the frame.
The warp acts as the structural foundation, so it should be strong enough to withstand repeated tension.
Begin Weaving
Pass your fabric strips or yarn over and under the warp threads.
After each row, gently push the weft downward to create a compact surface. Avoid beating it so aggressively that the sides begin drawing inward.
Maintain Straight Edges
One of the most common challenges for beginners is uneven edges.
Check both sides regularly. If one edge starts becoming narrower, adjust the amount of material you place in the next few rows rather than waiting until the rug is finished.
For inspiration on different construction methods, Martha Stewart’s guide to rug types and techniques explains the differences between flat weave, braided, hand-tufted, and hand-knotted rugs.

Choosing the Right Material
Different materials produce very different results.
Cotton
Cotton is versatile, relatively easy to work with, and suitable for casual rugs and mats.
Wool
Wool provides warmth and a substantial feel. It is commonly used in traditional rug construction, although quality and care requirements vary by fiber and construction.
Jute
Jute provides a natural, rustic appearance and works particularly well with neutral or earthy interiors.
T-Shirt Fabric
Recycled T-shirts create a soft, casual texture and are useful for up cycling projects.
Synthetic Rope
Polyester rope can be useful for mats that need a relatively durable, wipe able surface. Always check the manufacturer’s recommendations for the specific material and adhesive or coating you use.
How to Choose the Right Rug Size
Measure the intended area before beginning your project.
A useful DIY trick is to mark the proposed rug dimensions on the floor using painter’s tape. This allows you to see whether the size works with the furniture before investing hours into construction.
For living rooms, consider how the rug interacts with sofas and chairs rather than simply measuring the empty floor. Martha Stewart’s decorating guidance similarly recommends using tape to visualize rug dimensions before committing to a size.
For a handmade rug, it is usually easier to make a slightly smaller project than to discover halfway through that you don’t have enough fabric or yarn.
Add a Non-Slip Backing
A beautiful handmade rug isn’t particularly useful if it constantly moves underfoot.
For rugs placed on smooth floors, consider a commercially appropriate non-slip rug pad or backing material. Choose a product compatible with your flooring.
Avoid relying on improvised adhesives directly on delicate flooring without checking compatibility first.
For children’s rooms, hallways, bathrooms, and other areas where slipping could be a concern, stability should be treated as part of the design rather than an afterthought.
Finishing Your Handmade Rug
The finishing stage can make the difference between a homemade-looking project and a polished one.
Trim Loose Threads
Carefully inspect the entire surface and remove loose strands.
Straighten the Edges
If the rug has a woven or braided construction, check the perimeter for uneven sections and secure loose ends.
Flatten the Rug
Lay the rug flat and allow it to settle naturally. Some handmade constructions may need gentle blocking or shaping to achieve the desired dimensions.
Test It Before Regular Use
Place it in its intended location and check:
- Does it lie flat?
- Do the edges curl?
- Does it slide?
- Are any threads coming loose?
- Does furniture catch on the edges?
Fix these problems before regular foot traffic begins.
Common DIY Rug-Making Mistakes
Making the Rug Too Large
Large rugs require considerably more material and time than beginners often expect. Start with a small mat or accent rug.
Using Inconsistent Materials
Combining extremely thick and thin materials can create an uneven surface.
Pulling Fabric Too Tightly
Excessive tension can cause braided or woven rugs to curl and pucker.
Ignoring the Backing
A rug needs appropriate structural support, particularly when using tufting, loose fabric, or decorative materials.
Skipping a Test Section
Before committing to an entire rug, make a small sample. This lets you evaluate color, thickness, tension, and texture.
How to Care for a Handmade Rug
Care depends heavily on the material and construction.
Vacuum gently when appropriate and follow the care instructions for the fibers you’ve used. For washable fabric rugs, check colorfastness and shrinkage before washing the entire piece.
When using a cleaning solution, testing it on an inconspicuous area first is a sensible precaution because different fibers and dyes can react differently.
Never assume that a handmade rug is machine washable simply because its individual materials are washable.
A Simple Beginner Project to Try
If this is your first rug, start with a 2 × 3-foot braided fabric rug.
You could use:
- 4–6 old cotton sheets or comparable fabric
- Sharp fabric scissors
- Strong thread
- Sewing needle
- Measuring tape
- Non-slip rug pad
Choose three complementary colors, cut reasonably consistent strips, braid them, and gradually coil the braid into an oval or rectangular shape. Sew the adjoining sections together as you work.
This project is large enough to teach you the fundamentals without requiring the material commitment of a full-size area rug.
Final Thoughts
Learning how to make your own rugs at home is less about having expensive equipment and more about choosing an appropriate technique and working patiently. Braiding is an excellent starting point for fabric scraps, crochet works well for smaller textured pieces, weaving offers greater design flexibility, and tufting is ideal for bold graphic patterns.
Start small, test your materials, maintain consistent tension, and pay attention to the finishing details. With those fundamentals in place, everyday materials such as old T-shirts, sheets, yarn, and fabric scraps can become functional pieces of home decor with a distinctly personal character.
