

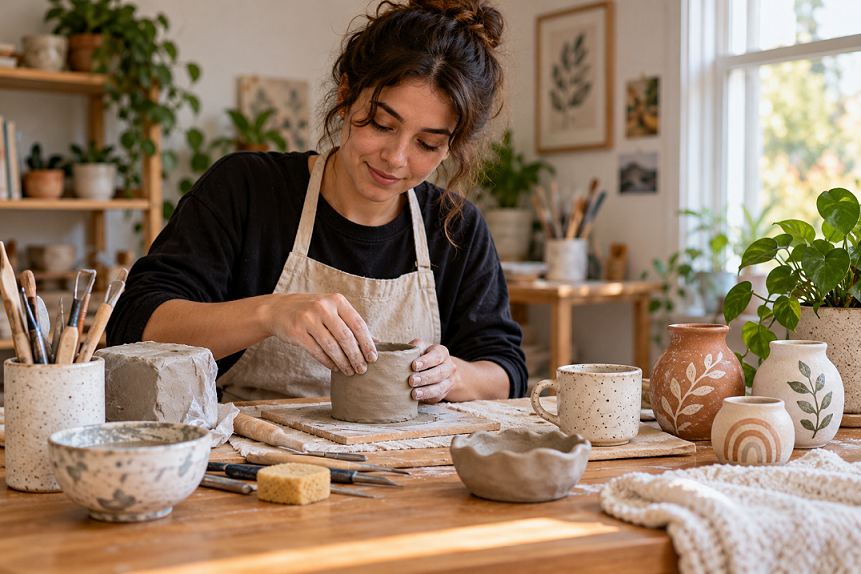
Making pottery at home has become increasingly accessible. You do not need a professional studio, pottery wheel, or large kiln to begin shaping clay and creating decorative objects. However, there is an important distinction between making pottery and making true fired ceramics.
You can absolutely make clay-based projects at home without owning a kiln. Air-dry clay, oven-bake modeling materials, and certain cold-finish techniques allow beginners to create bowls, ornaments, sculptures, trays, and decorative pieces. But if you want a traditional ceramic vessel that is durable, water-resistant, and suitable for food use, proper kiln firing is normally essential.
Understanding that difference will help you choose the right material, avoid disappointing results, and create pottery safely in a home environment.
What Makes Clay Become Ceramic?
Clay starts as a workable, moldable material. When traditional ceramic clay is dried, it becomes hard but remains fundamentally different from fired pottery.
The major transformation happens during firing. According to Ceramic Arts Network, firing changes the physical and chemical structure of clay, turning relatively fragile green ware into a much more durable ceramic material.
During firing:
- Remaining physical water is driven out.
- Chemically bound water is removed.
- Organic materials burn away.
- Clay particles begin to sinter and fuse.
- At higher temperatures, vitrification can occur.
- Glazes melt and form a glass-like surface.
This is why simply leaving ordinary pottery clay to dry does not produce the same result as firing it.
So, Can You Make Pottery Without a Kiln?
Yes—but it depends on what you mean by pottery.
If your goal is to make decorative objects, sculptures, jewelry dishes, ornaments, or small display pieces, you have several kiln-free options.
If your goal is to make traditional ceramic mugs, dinner plates, functional bowls, or watertight vases from conventional pottery clay, you generally need access to a kiln.
Ceramic Arts Network notes that firing is what makes clay durable enough to function as ceramic.
The key is choosing the appropriate material for your intended use.
1. Air-Dry Clay: The Easiest Kiln-Free Option
Air-dry clay is probably the most convenient choice for beginners.
Unlike conventional ceramic clay, air-dry clay is formulated to harden through drying rather than high-temperature firing. You can shape it, allow it to dry, and then decorate the finished piece.
What Can You Make With Air-Dry Clay?
Good beginner projects include:
- Decorative bowls
- Jewelry dishes
- Wall ornaments
- Small sculptures
- Plant-pot covers
- Candle holders for decorative use
- Figurines
- Christmas ornaments
- Trinket trays
- Decorative vases
The major advantage is simplicity. You can work on a kitchen or craft table without installing specialized equipment.
What Are the Limitations?
Air-dry clay should not automatically be treated as equivalent to fired ceramic.
Depending on the manufacturer’s formulation and finishing system, air-dry pieces may be more vulnerable to water, impact, or prolonged moisture exposure. They are therefore generally better suited to decorative rather than food-contact applications.
Always follow the specific manufacturer’s instructions for sealing, painting, curing, and intended use.
2. Oven-Bake Modeling Clay
Another option is oven-bake modeling clay, commonly used for small decorative projects and miniature objects.
These materials harden when heated according to the manufacturer’s instructions. They are different from conventional ceramic clay and should not be confused with pottery clay.
This method works particularly well for:
- Small sculptures
- Miniature decorations
- Jewelry components
- Decorative handles
- Small ornaments
- Model-making projects
One important rule is to follow the manufacturer’s recommended temperature and baking time exactly. A household oven is not a substitute for a ceramic kiln when working with conventional pottery clay.
3. Cold-Finish Clay Projects
You can also create pottery-inspired objects using materials such as paper clay, homemade modeling compounds, or other non-ceramic craft clays.
These can be excellent for experimentation because they let you practice:
- Pinching
- Coiling
- Slab construction
- Surface decoration
- Texture
- Sculptural forms
For beginners, these techniques can be useful preparation for eventually working with traditional ceramic clay.
Traditional Pottery Techniques You Can Practice Without a Kiln
One of the most useful things about kiln-free pottery is that you can learn the forming techniques even before investing in professional equipment.
Pinch Pots
Start with a ball of suitable clay and gradually press your thumb into the center. Rotate the clay while pinching the walls between your fingers.
This simple technique teaches you how to control:
- Wall thickness
- Shape
- Pressure
- Symmetry
- Rim formation
Coil Building
Roll clay into long, even coils and stack them to create a vessel.
Smooth the coils together or deliberately leave some texture visible.
Coil building is particularly useful for making:
- Planters
- Sculptures
- Vases
- Decorative containers
Slab Building
Roll clay into relatively even sheets and cut them into shapes.
The slabs can then be joined to create boxes, trays, plates, and architectural forms.
A simple rolling pin and thickness guides can help produce more consistent slabs.
What About Using a Kitchen Oven?
This is where beginners should be particularly careful.
A normal household oven is not a ceramic kiln.
Traditional ceramic clay requires controlled high-temperature firing. Ceramic Arts Network explains that different clay bodies and glazes mature at specific temperatures, and firing outside those ranges can result in weak, damaged, deformed, or melted work.
A household oven can be appropriate for a product specifically designed to cure in an oven, but that does not mean it can properly fire ordinary pottery clay.
Never improvise a ceramic firing inside a domestic oven.
Can You Make a Functional Mug Without a Kiln?
For traditional ceramics, generally no.
Imagine making a beautiful mug from ordinary stoneware clay. You shape it perfectly, allow it to dry, and paint it.
It may look like a finished ceramic mug—but without appropriate firing, the clay has not undergone the transformation required to become durable ceramic.
A traditionally made functional mug normally goes through:
- Forming
- Drying
- Bisque firing
- Glazing
- Glaze firing
The firing stages are critical. Ceramic Arts Network describes bisque firing as transforming green ware into a more durable, porous form suitable for glazing, followed by further firing to mature the glaze and ceramic body.
For this reason, a kiln-free craft object should not automatically be marketed or treated as food-safe pottery.
How to Make Real Ceramics Without Owning a Kiln
Here’s the good news: you don’t necessarily need to own a kiln.
Many beginners and hobby potters make their work at home and then use a community studio, pottery school, ceramic workshop, or professional firing service.
A Practical Home-to-Studio Workflow
You can:
Step 1: Make the piece at home
Use traditional pottery clay and hand-building techniques.
Step 2: Let it dry completely
The piece must reach the appropriate bone-dry stage before firing.
Step 3: Transport it carefully
Bone-dry clay is extremely fragile.
Step 4: Have it professionally bisque fired
A studio can fire the work using an appropriate kiln and firing schedule.
Step 5: Glaze the piece
Apply a compatible ceramic glaze.
Step 6: Have it glaze fired
The studio performs the second firing according to the clay and glaze requirements.
This approach gives you access to genuine ceramic processes without purchasing and installing a kiln.
Why Proper Drying Matters
One of the easiest mistakes beginners make is rushing the drying process.
A thick piece may appear dry on the outside while retaining moisture inside. During firing, trapped moisture can turn into steam and damage or even explode the piece.
Ceramic Arts Network recommends ensuring pottery is thoroughly dry before firing and explains that moisture needs to be removed carefully during the early stages of firing.
Better Drying Practices
- Dry pieces slowly.
- Avoid placing large pieces directly in intense sunlight.
- Rotate pieces when appropriate.
- Cover them loosely if they are drying too quickly.
- Pay particular attention to thick sections.
- Avoid joining extremely thick and thin areas without considering drying differences.
Slow, controlled drying is usually much safer than trying to accelerate the process.
Decorating Pottery Without a Kiln
Kiln-free projects offer plenty of creative possibilities.
Depending on the material, you can use:
- Acrylic paint
- Water-based craft paints
- Metallic finishes
- Pigments
- Texture tools
- Stamps
- Stencils
- Sealers
- Decorative varnishes
For air-dry clay, a common workflow is:
Shape → Dry → Sand → Paint → Seal
However, the appropriate sealer depends on the material and intended use.
If the finished object will come into contact with food or beverages, do not assume that ordinary craft paint or varnish makes it food-safe.
Common Mistakes Beginners Should Avoid
Using the Wrong Clay
Don’t buy conventional pottery clay assuming it will harden permanently just by sitting on a shelf.
Check whether the material is:
- Air-dry
- Oven-bake
- Polymer-based
- Ceramic clay requiring kiln firing
Making Walls Too Thick
Thick forms can dry unevenly and may be more susceptible to cracking or firing problems.
Rushing Drying
Rapid drying can create stress and cracks.
Treating Painted Air-Dry Clay as Ceramic
A glossy surface does not mean the underlying material has become fired ceramic.
Using a Household Oven for Ceramic Firing
A domestic oven does not provide the controlled temperatures and firing environment required for conventional ceramic clay.
Is a Home Kiln Worth It?
For someone who is just experimenting, probably not immediately.
A better approach can be to begin with hand-building and use a local studio for firing.
Once you know that ceramics is something you want to pursue regularly, you can investigate purchasing a kiln.
A kiln introduces additional considerations, including:
- Electrical requirements
- Ventilation
- Kiln placement
- Heat-resistant surroundings
- Firing schedules
- Clay compatibility
- Glaze compatibility
- Maintenance
- Safety procedures
Kiln firing is a technical process, not simply a matter of making something extremely hot. Different clays and glazes require specific firing ranges, and overheating can cause deformation or melting.
Three Authoritative Resources for Learning More
If you want to explore ceramic techniques and firing in greater depth, these resources are useful:
- Ceramic kiln firing techniques — Ceramic Arts Network provides practical guidance on drying, kiln operation, firing, cones, and safety.
- Understanding the ceramic firing process — A detailed explanation of the physical and chemical changes clay undergoes during firing.
- A guide to ceramic kilns and firing methods — Covers different kiln types, firing methods, and the role of controlled heat in ceramics.
These are more directly relevant to the technical subject than a general lifestyle article, and they provide useful background for anyone moving from craft clay into traditional ceramics.
Final Thoughts
So, can you make ceramics at home without a kiln?
You can absolutely make beautiful clay-based artwork without owning a kiln. Air-dry clay and oven-curing materials make home crafting accessible, affordable, and beginner-friendly.
But there is an important technical distinction: traditional ceramic pottery requires firing to become durable ceramic ware. If you want genuine ceramic mugs, bowls, plates, or vases, the practical solution is to make the pieces at home and use a local pottery studio or professional kiln service for firing.
For beginners, this can actually be the best of both worlds. You can develop your hand-building skills at home, experiment with shapes and textures, and gain experience with clay before investing in expensive equipment.
The kiln does not have to be in your home for you to become a potter—it simply needs to be part of the process when you’re working with traditional ceramic clay.
