

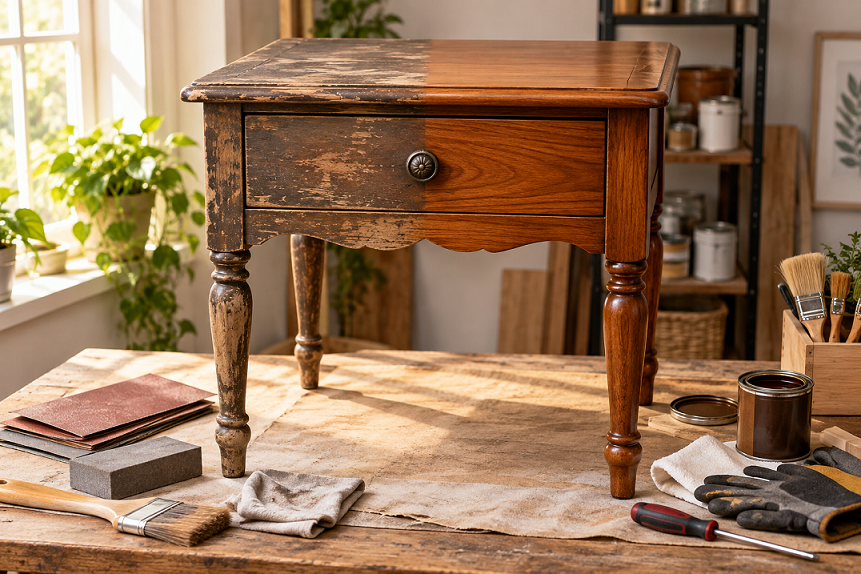
Restoring old furniture can be one of the most satisfying weekend DIY projects. A scratched side table, tired wooden chair, or dated dresser can often be repaired and refreshed without completely rebuilding it. The key is knowing what the furniture is made from, understanding the existing finish, and resisting the temptation to remove more material than necessary.
A successful restoration is not simply about making old furniture look new. Good restoration preserves useful original material, repairs structural problems, and gives the piece a durable finish that suits how it will be used.
For beginners, a small wooden table, bedside cabinet, stool, or simple chair is an excellent starting point. More valuable antiques or pieces with significant structural damage deserve additional care—and sometimes professional restoration.
What You Need Before Starting
A weekend project becomes much easier when everything is prepared beforehand.
Basic Tools
You may need:
- Screwdrivers
- Sandpaper in several grits
- Sanding block
- Wood scraper
- Small paintbrushes
- Clean lint-free cloths
- Wood filler
- Wood glue
- Clamps
- Protective gloves
- Safety glasses
- Dust mask or suitable respirator
- Drop cloth or plastic sheeting
For refinishing, you may also need wood stain, paint, primer, or a protective topcoat.
The exact materials depend on the furniture’s condition and the finish you want. Forbes Home similarly identifies sanding materials, cleaning cloths, wood filler, and suitable paint or finishing materials among the basic supplies for furniture refinishing.
Step 1: Inspect the Furniture Carefully
Before sanding or painting, spend 15–20 minutes examining the entire piece.
Check:
- Are the legs stable?
- Are joints loose?
- Is the wood cracked?
- Is the surface solid wood or veneer?
- Is there peeling paint or varnish?
- Are screws or nails missing?
- Is there evidence of insects or moisture damage?
- Does the furniture have unusual markings or craftsmanship that suggest it could be valuable?
This inspection determines whether you should restore, refinish, repaint, or simply clean the piece.
Don’t Sand Valuable Antiques Immediately
Aggressive sanding can permanently remove original surfaces, details, and patina. If a piece appears antique, rare, signed, unusually constructed, or potentially valuable, research it before changing the finish.
For valuable antiques or extensive damage, professional restoration may be more appropriate than a weekend DIY treatment.
Step 2: Clean Before You Repair
Old furniture often contains years of dust, grease, wax, and household grime.
Start with gentle cleaning rather than immediately reaching for sandpaper. Use an appropriate furniture cleaner and a soft cloth, testing the method in an inconspicuous area first.
Allow the furniture to dry completely.
This simple step can reveal that some apparent discoloration is actually surface dirt rather than damaged wood.
Step 3: Repair Loose Joints and Structural Damage
A beautiful finish cannot compensate for a wobbly piece of furniture.
For loose wooden joints:
- Carefully disassemble the joint if practical.
- Remove old adhesive and debris.
- Apply suitable wood glue.
- Reassemble the joint.
- Clamp it securely.
- Allow the adhesive to cure according to the manufacturer’s instructions.
Small dents and holes can often be treated with compatible wood filler. Once completely dry, sand the repaired area until it is level with the surrounding surface.
For deep cracks, broken structural components, extensive veneer damage, or unstable chairs, stop and assess whether the repair requires specialist tools or experience.
Step 4: Sand With Patience

Sanding is one of the easiest stages to get wrong.
The goal is not necessarily to sand the furniture down to completely raw wood. You want to create an appropriate surface for the new finish while preserving as much original material as possible.
For many furniture projects, medium-grit sandpaper can be followed by finer paper to smooth the surface. This Old House recommends 150-grit sandpaper for certain wood-finishing preparation and specifically warns about accidentally sanding through thin veneer.
Sand With the Grain
Move the sandpaper in the direction of the wood grain whenever practical.
Pay particular attention to:
- Edges
- Corners
- Moldings
- Veneer
- Carved details
These areas can be damaged quickly by aggressive sanding.
After sanding, remove dust thoroughly before applying stain, paint, or finish.
Step 5: Decide Between Staining and Painting
This is where you choose the furniture’s new appearance.
Choose Stain When:
- The wood grain is attractive.
- You want a natural appearance.
- The surface can be prepared evenly.
- You want to highlight the existing wood character.
Always test stain on an inconspicuous section or scrap of matching wood first. Different woods absorb stain differently, so the color shown on a container may not exactly match the final result.
Choose Paint When:
- The wood has extensive cosmetic imperfections.
- You want a dramatic color change.
- The furniture contains mixed materials.
- You prefer a contemporary or decorative appearance.
If you’re painting, proper preparation and a compatible primer can help produce a more uniform finish.
Step 6: Apply the New Finish
For a stained finish, work in manageable sections and follow the product’s instructions for application and drying time.
Wipe away excess stain consistently rather than allowing uneven pools to dry on the surface. This Old House’s furniture-finishing guidance emphasizes following the grain and removing excess stain rather than leaving it sitting on the wood.
For painted furniture, apply thin, even coats rather than trying to achieve complete coverage in one heavy application.
Allow each coat to dry according to the manufacturer’s instructions before deciding whether another coat is necessary.
Step 7: Protect the Restored Surface
The final protective coating is especially important for furniture that receives regular use.
Depending on the project, options may include:
- Polyurethane
- Lacquer
- Furniture wax
- Other manufacturer-approved protective finishes
Choose the product according to the furniture’s intended use and compatibility with the underlying finish.
A bedside table may require a different level of protection from a decorative cabinet that receives little handling.
A Practical Weekend Restoration Schedule
A simple project can be organized across two days.
Saturday Morning: Inspection and Cleaning
Start by photographing the original condition. Remove hardware where appropriate, clean the furniture, and identify structural problems.
Saturday Afternoon: Repairs and Surface Preparation
Repair loose joints, fill suitable imperfections, and sand carefully.
Don’t rush this stage. Surface preparation often determines whether the final finish looks professional or uneven.
Saturday Evening: First Finish
Apply the first coat of stain, paint, or another compatible finish. Give it adequate drying time.
Sunday Morning: Second Coat or Touch-Ups
Inspect the surface in good natural light. Lightly smooth any imperfections where appropriate and apply another coat if required.
Sunday Afternoon: Protection and Reassembly
Apply the final protective finish, reinstall hardware, and allow the furniture to cure according to the product instructions before putting it into heavy use.
The exact timeline varies considerably depending on the products, temperature, humidity, furniture size, and required drying or curing times.
How to Repair Scratches Without Fully Refinishing
Not every old piece needs complete restoration.
Light surface abrasions may require only localized treatment. Deeper scratches that penetrate through the finish and into the wood require more involved repair.
A useful approach is to determine which layer is actually damaged:
Surface finish damaged → localized finish repair may be enough.
Stain damaged → color may need to be restored.
Wood damaged → filling, blending, staining, and refinishing may be necessary.
This layered approach prevents unnecessary sanding and helps preserve more of the original furniture.
Common Mistakes to Avoid
Sanding Too Aggressively
Power sanders can remove material surprisingly quickly, particularly from veneer and edges. Hand sanding gives you greater control on many furniture projects.
Skipping Cleaning
Finishing over wax, grease, or grime can interfere with adhesion and produce an inconsistent result.
Applying Thick Coats
Heavy coats can create runs, uneven texture, and longer drying times. Several controlled coats are generally easier to manage.
Ignoring Drying and Curing Times
A finish can feel dry while still requiring additional time to fully cure. Follow the manufacturer’s instructions before placing heavy objects on the surface.
Replacing Original Hardware Unnecessarily
Original handles, hinges, and knobs can contribute significantly to a piece’s character. Clean and evaluate them before automatically replacing them.
Safety Considerations
Furniture restoration can involve dust, solvents, stripping products, paints, and finishes.
Work in a well-ventilated area, wear appropriate protective equipment, and follow the safety instructions on every product you use.
If you’re removing old paint or an unknown coating, take additional precautions. Different finishes require different removal methods, and older painted furniture can present additional hazards. This Old House notes that furniture may contain finishes including latex paint, oil-based paint, lacquer, shellac, and varnish, each requiring appropriate treatment.
Never mix cleaning chemicals or finishing products unless the manufacturer specifically says they are compatible.
Final Thoughts
Restoring old furniture doesn’t have to mean completely stripping a piece and rebuilding it. In many cases, the best results come from cleaning carefully, repairing structural problems, sanding selectively, choosing an appropriate finish, and protecting the completed surface.
The most important lesson for a first weekend project is to work slowly. Inspect before sanding, test finishes before applying them broadly, and preserve original material whenever possible. A modestly scratched wooden table can become an attractive and functional piece again with relatively simple tools and thoughtful preparation.
The finished furniture may not look factory-new—and it doesn’t have to. Good restoration allows the character of an older piece to remain while making it useful, durable, and enjoyable for years to come.
