

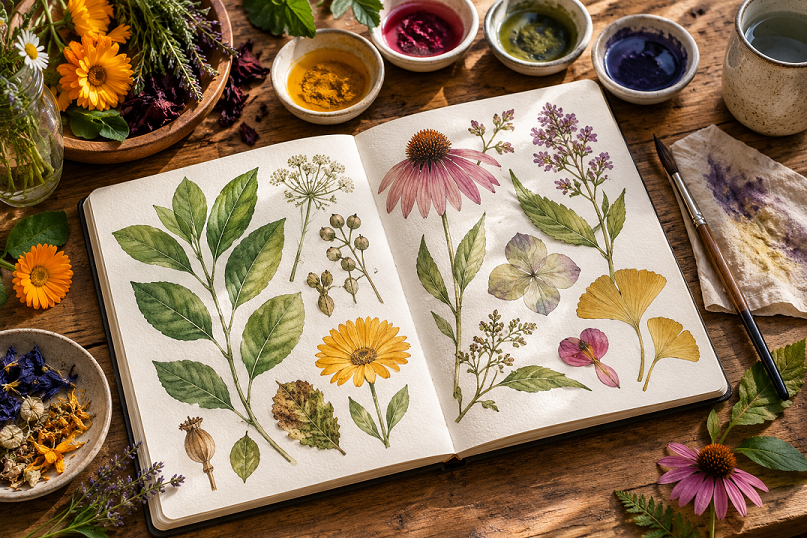
Bio art brings together creativity and the natural world by using living or biological materials as inspiration—and sometimes as part of the artistic process itself. One accessible way to explore this idea is through a sketchbook filled with plant impressions, botanical drawings, pressed specimens, and colors made from natural materials.
Instead of relying entirely on conventional paints, artists can experiment with petals, leaves, roots, berries, spices, and other plant materials to create subtle washes and earthy pigments. The results are often less predictable than commercial paints, but that unpredictability is part of the appeal.
Botanical art has a long relationship with scientific observation. The Royal Botanic Gardens, Kewpie notes that botanical illustration has historically helped scientists document and identify plant characteristics, making careful observation an important part of the practice.
What Is Bio art?
Bio art is a broad creative field that explores relationships between art, biology, and living systems. It can include work involving plants, microorganisms, natural materials, ecological processes, and biological forms.
For a sketchbook artist, however, bio art does not need to involve sophisticated laboratory techniques. A simple plant-based sketchbook can become a form of bio art when you deliberately investigate plants through drawing, collecting observations, making pigments, and recording how natural materials behave.
The important distinction is that natural dye and natural pigment are not exactly the same thing. A dye is generally a soluble colorant that can be transferred through a solution, while a pigment is an insoluble colored material that can be mixed with a binder to create paint. The Smithsonian explains this distinction in its discussion of natural and synthetic dyes.
Why Use Plants in a Sketchbook?
Working with plants changes the way you approach drawing.
Instead of simply looking at a flower and reproducing its appearance, you begin asking questions:
- What happens when the petal is pressed onto paper?
- Does the color change as it dries?
- Which part of the plant produces the strongest color?
- Does the same plant create different shades?
- How does the color behave when diluted?
- Does the paper affect the final result?
This makes the sketchbook both an art journal and an observation journal.
Botanical illustration itself has an important scientific history. Kewpie describes botanical artists as contributors to plant documentation and identification, with illustrations helping communicate details that photographs may not always emphasize.
Natural Materials You Can Explore
You don’t need a large collection of specialist materials to begin.
Flowers and Petals
Flowers can provide some of the easiest materials for experimentation. Marigold, hibiscus, rose petals, and other strongly colored flowers may produce interesting washes or impressions.
However, the visible color of a flower does not guarantee that it will produce a strong or permanent dye. Some pigments fade quickly when exposed to light.
Kewpie’s practical guide to petal painting demonstrates how flower petals can be directly used to transfer color onto paper and emphasizes that different petals release color differently.
Leaves
Fresh leaves can be used for direct impressions, rubbing techniques, or as inspiration for botanical drawings.
Try placing a leaf beneath thin paper and gently rubbing the surface with graphite or another suitable drawing medium. You can then add plant-derived washes around the impression.
Turmeric
Turmeric is an accessible source of strong yellow coloration and is particularly useful for simple experiments.
Its intense color makes it suitable for testing dilution, layering, and color mixing. Remember, though, that kitchen ingredients aren’t automatically archival art materials.
Indigo
Indigo has an exceptionally long history as a natural dye. Kewpie notes that indigo-bearing plants, particularly those in the Indigofera genus, have been used for centuries and are known for producing relatively colorfast blue dye.
For sketchbook experimentation, indigo can provide deep blue washes and can also be combined visually with yellow plant colors to explore green.
Onion Skins
Onion skins can produce warm yellow, gold, orange, and brownish tones depending on the material and extraction process.
They’re also a convenient way to begin experimenting with plant color because they are commonly available as kitchen waste.
How to Make a Simple Plant-Dye Sketchbook
You don’t need complicated equipment for a beginner’s project.
Step 1: Choose Your Plant Materials
Start with three or four materials rather than collecting everything you can find.
For example:
- Turmeric — yellow
- Onion skins — warm yellow/brown
- Red cabbage — blue-purple experiments
- Flower petals — variable pink, red, orange, or purple tones
Only collect plants that you can confidently identify as safe to handle. Avoid unknown plants, and wash your hands after working with plant materials. Kewpie specifically advises caution because some flowers and leaves can be toxic.
Step 2: Prepare Your Sketchbook
Watercolor paper is preferable because ordinary notebook paper can buckle or become damaged when repeatedly whetted.
A useful setup is:
- Use a heavyweight watercolor sketchbook.
- Place scrap paper underneath the working page.
- Keep a clean water container nearby.
- Label each experiment with the plant name and date.
- Leave enough space for notes.
The labeling step is particularly valuable. Over time, your sketchbook becomes a personal reference library of natural colors.
Step 3: Create a Simple Color Extraction
For a basic experiment, place suitable plant material in water and gently heat it to encourage the color to transfer into the liquid.
Allow the solution to cool before using it.
The exact color will depend on the plant, amount of material, extraction method, water chemistry, paper, and concentration. This is why documenting your process is so useful.
For more advanced pigment-making, artists can explore traditional methods that convert soluble plant dyes into insoluble pigments. Kewpie has documented workshops involving madder, woad, and weld and the traditional “lake” pigment process.
Step 4: Create a Color Swatch Page
Before painting a finished illustration, create a test page.
For each plant, record:
Plant: Turmeric
Color: Golden yellow
Extraction: Water-based
Dilution: Strong / Medium / Light
Paper: Watercolor paper
Date: [Add date]
Create several boxes showing different concentrations.
This gives you a visual record of how the material behaves.
Five Creative Techniques to Try
1. Direct Petal Painting
Place a fresh petal on watercolor paper and gently press or rub it across the surface.
This produces an organic mark that can become the starting point for a larger illustration.
2. Botanical Printing
Place a leaf or flower between sheets of paper and apply gentle pressure.
The transferred shape can become a background layer for botanical drawings.
3. Natural-Dye Washes
Use diluted plant color like watercolor.
Apply several thin layers rather than one heavy layer. Transparent layers can create more nuanced results and allow the paper texture to remain visible.
4. Plant + Ink Illustration
Combine natural color with conventional waterproof or archival drawing ink.
For example, outline a leaf with ink and use a plant-derived wash to create its interior color.
This approach provides more control while preserving the organic character of natural color.
5. Experimental Color Mapping
Instead of trying to create a realistic painting, turn your sketchbook into a scientific-looking color map.
Draw a plant and label:
- Stem
- Leaf
- Flower
- Seed
- Root
- Natural color
- Extracted color
This approach combines botanical observation with visual experimentation.
How to Make Natural Colors More Interesting
One of the most useful techniques is layering.
Start with a very diluted wash. Let it dry completely, then apply another layer.
Repeat the process several times.
This can produce greater depth without immediately saturating the paper.
You can also experiment with:
- Different water-to-dye ratios
- Wet versus dry paper
- Smooth versus textured paper
- Single-color washes
- Overlapping plant colors
- Natural materials combined with commercial watercolor
- Different extraction times
Keep one variable consistent whenever possible. If you change five things at once, it becomes difficult to understand why the result changed.
The Importance of Recording Your Experiments
A serious natural-dye sketchbook should contain more than finished artwork.
Think of every page as a small experiment.
Record:
Material → Preparation → Color → Technique → Result → Observations
For example:
“Marigold petals produced a soft yellow wash. The strongest color appeared during the first application, while diluted layers created a pale transparent effect.”
This approach develops practical experience over time and makes it easier to reproduce successful results.
It also reflects the observational tradition of botanical art. Kewpie’s botanical collections demonstrate how visual documentation can preserve information about plants beyond simply creating an attractive picture.
Are Natural Dyes Permanent?
Not necessarily.
This is one of the most important things beginners should understand.
Natural colorants vary significantly in their light fastness and stability. Some may fade considerably with prolonged exposure to sunlight, while others are comparatively durable.
Indigo, for example, has a reputation for strong colorfastness in traditional dyeing applications.
However, a color that performs well on textiles does not automatically have the same performance on paper.
If you want to preserve important artwork:
- Keep finished pages away from direct sunlight.
- Store the sketchbook in a dry environment.
- Photograph important pages.
- Label materials and techniques.
- Consider using conventional archival materials for the final artwork while reserving natural dyes for experimental pages.
Natural Dyes and Traditional Art Practices
Plant-based color is not simply a modern craft trend.
Natural dyes and pigments have been used across cultures for centuries. The Metropolitan Museum of Art explains that natural dyes from plants and animals were widely used before synthetic dyes emerged in the 19th century. Its conservation research also shows how scientists can identify historical dyes to investigate the origins and materials of artworks and textiles.
Contemporary artists continue to explore these traditions.
For example, Smithsonian coverage of Indigenous artist Sara Flores describes how plant-based pigments form an important part of Shipboard-conibo artistic practice, demonstrating that natural color can carry cultural knowledge as well as aesthetic value.
This is an important reminder to approach traditional techniques respectfully. When learning from Indigenous or culturally specific practices, acknowledge their origins rather than presenting them as newly invented DIY techniques.
Real-World Applications of Plant-Based Art
Bio art-inspired sketchbooks can have applications beyond personal creativity.
Botanical Education
Students can combine plant identification with drawing and color experiments.
Nature Journaling
A natural-dye sketchbook can become part of a broader nature journal documenting seasonal changes.
Art Therapy and Mindful Creativity
Slow observational activities such as collecting, preparing, drawing, and recording materials can create a more deliberate creative routine. However, this should be understood as a creative practice rather than a substitute for professional mental-health treatment.
Environmental Art
Artists can use locally available plant materials to explore themes such as biodiversity, seasonal change, agriculture, and human relationships with nature.
Scientific Communication
Careful botanical sketches can communicate structural details that may be difficult to capture through a quick photograph. The Smithsonian’s botanical illustrator Alice Tangerini, for example, has used detailed plant illustrations in collaboration with scientific collections and researchers.
A Simple Weekend Bio art Project
If you’re new to natural dyes, try this small project.
Day 1: Collect and Observe
Choose three safe, locally available plant materials. Photograph them and sketch their shapes.
Day 1: Extract
Prepare small amounts of color from each material.
Day 1: Test
Create a page containing swatches ranging from concentrated to highly diluted.
Day 2: Draw
Choose one plant and create a detailed botanical illustration.
Day 2: Add Color
Use your homemade colors to paint the illustration.
Day 2: Document
Write down what worked, what didn’t, and how the colors changed after drying.
The finished page becomes more than a drawing—it becomes a record of a small creative investigation.
Responsible Foraging and Sustainability
Using natural materials doesn’t automatically make an artwork environmentally sustainable.
Avoid damaging wild populations or removing large quantities of plants. Whenever possible, use fallen leaves, garden trimmings, kitchen waste, or responsibly cultivated plants.
Never harvest protected species or collect from conservation areas without permission.
The environmental impact also depends on how materials are processed, transported, and disposed of. A small local experiment using kitchen scraps may have a very different footprint from commercially harvested exotic plant materials.
Final Thoughts
Bio art offers an enjoyable way to slow down and pay closer attention to the natural world. By combining botanical drawing with plant-based color, your sketchbook can become a place for observation, experimentation, documentation, and artistic discovery.
The most valuable lesson is not producing a perfectly consistent color. Natural materials are variable—and learning how they behave is part of the creative process.
Start with a few accessible plants, record every experiment, protect your finished work from excessive light, and gradually develop your own natural palette. Over time, your sketchbook can become both an evolving artwork and a fascinating record of the plants and colors you encounter.
